
 Why Mobile Tyre Replacement is the Future of Car Maintenance
  The Real Cost of Anime Car Wraps: What You Need to Know Before Going Full Itasha
  The Importance of Quiet Generators for Peaceful Sleep: Featuring the Jackery Solar Generator 2000 Plus
  Why WEX Motorpass Is the Smart Choice for Business Fuel Management
  Top Choice for 4WD and Overlanding Rentals in Bozeman
  How Car Window Tinting Enhances Privacy and Protection on the Road
  Certified Preowned Cars: Are They Worth It?
  Apps That Help Diagnose Car Problems Like a Mechanic
  How to Track Fuel Efficiency and Expenses Using Smart Apps
Introduction
Modern driving demands greater safety, and parking sensors have become essential tools for enhancing parking accuracy and reducing the risk of accidents. If you own an older car, you don’t have to miss out on this convenience. Retrofitting parking sensors is a cost-effective and practical way to modernize your vehicle, making parking safer and more manageable. This comprehensive guide will walk you through everything you need to know about retrofitting parking sensors, ensuring a smooth and successful upgrade.
Understanding Parking Sensors
What Are Parking Sensors?
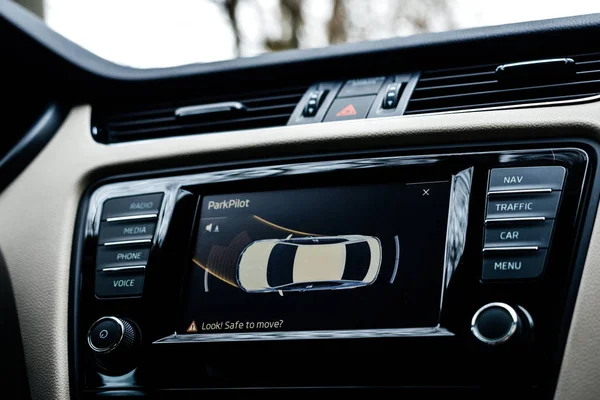
Parking sensors are devices that use ultrasonic or electromagnetic technology to detect objects around your vehicle. These sensors emit signals and calculate the distance between the car and obstacles, providing feedback to the driver through audible alerts, visual displays, or both.
Types of Parking Sensors
- Ultrasonic Sensors: These are the most common, using sound waves to detect objects.
- Electromagnetic Sensors: These create a magnetic field around the bumper, detecting disruptions caused by nearby objects.
Wired vs. Wireless Systems
- Wired Systems: Provide stable connections but require more complex installation.
- Wireless Systems: Easier to install, though slightly more expensive.
Benefits of Parking Sensors
- Improved safety during parking.
- Enhanced visibility in blind spots.
- Reduced risk of vehicle damage.
- Increased resale value of your car.
Preparing for the Retrofit
Assess Your Car’s Compatibility
- Inspect the bumper material and space available for sensor installation.
- Determine whether your car’s design can accommodate wired or wireless systems.
Choosing the Right System
Consider your budget, desired features (e.g., front and rear sensors, visual displays), and trusted brands to ensure quality and durability.
Gathering Tools and Equipment
Common tools include:
- Drill and appropriate drill bits.
- Measuring tape and marker.
- Wiring tools and adhesives.
DIY vs. Professional Installation
- DIY: Suitable for those with basic automotive skills; cost-effective but requires time and effort.
- Professional Help: Ideal for those seeking precision and expertise, albeit at a higher cost.
Step-by-Step Guide to Retrofitting Parking Sensors
Step 1: Planning the Installation
- Identify suitable positions for the sensors on the bumper.
- Mark evenly spaced drill points for accuracy.
Step 2: Drilling the Bumper
- Use a drill with the appropriate bit size for your sensor kit.
- Ensure holes are aligned for a professional look.
Step 3: Mounting the Sensors
- Insert sensors securely into the drilled holes.
- Test the alignment to ensure they are flush with the bumper.
Step 4: Wiring the Sensors
- Route the wires from the sensors to the control unit.
- For wired systems, connect to the reverse lights or car battery.
- Conceal wires within the car’s interior for a clean finish.
Step 5: Installing the Control Unit and Display
- Position the control unit in a secure, dry area.
- Mount the display in a location visible to the driver, such as the dashboard.
Step 6: Testing the System
- Verify sensor functionality by parking near obstacles.
- Adjust sensitivity settings as needed.
Advanced Options and Upgrades
Integrating with a Backup Camera
- Pairing sensors with a camera enhances both visual and auditory parking aids.
Smartphone Integration
- Some systems connect to apps, providing advanced features like distance visualization.
Customizing Alerts
- Choose from beeps, tones, or voice notifications, and adjust sensitivity levels for optimal performance.
Maintenance and Troubleshooting
Regular Maintenance
- Clean sensors regularly to avoid dirt buildup.
- Inspect connections to ensure they remain secure.
Common Issues
- False Alerts: Check for dirt or misalignment.
- Wiring Problems: Inspect for loose or damaged cables.
When to Seek Professional Help
If issues persist despite troubleshooting, consult a professional to diagnose and resolve the problem.
Cost Analysis
Installation Costs
- DIY: $50–$150, depending on the kit.
- Professional: $200–$500, including labor.
Long-Term Benefits
- Enhanced safety and reduced repair costs from minor accidents.
- Increased car value when reselling.
Legal and Safety Considerations
- Ensure compliance with local laws regarding aftermarket modifications.
- Use sensors as aids, not substitutes for vigilant driving.
Conclusion
Retrofitting parking sensors on older cars is a smart and practical upgrade that enhances safety, convenience, and vehicle value. With the right tools and guidance, you can transform your car into a more modern and driver-friendly vehicle. Whether you choose to install sensors yourself or seek professional help, this upgrade is worth the investment for a safer and smoother driving experience.